Solexx flexible twin-wall greenhouse covering is easy to install on nearly all types of greenhouse frames. Unlike other types of covering, there are no channels or wiggle wires required for the greenhouse covering installation! In fact, Solexx can be scored and folded to go over greenhouse peaks thus reducing seams.
Below are some tips for installing the Solexx greenhouse material.
Tips for Installing Solexx Greenhouse Covering
1. FRAME SPACING: For optimal support, we recommend spacing the framing or trusses 24″ apart on center. If installing the Solexx vertically, 4 ft spacing between the ribs is adequate. Solexx paneling can be oriented with the flutes running either vertically or horizontally on your structure.
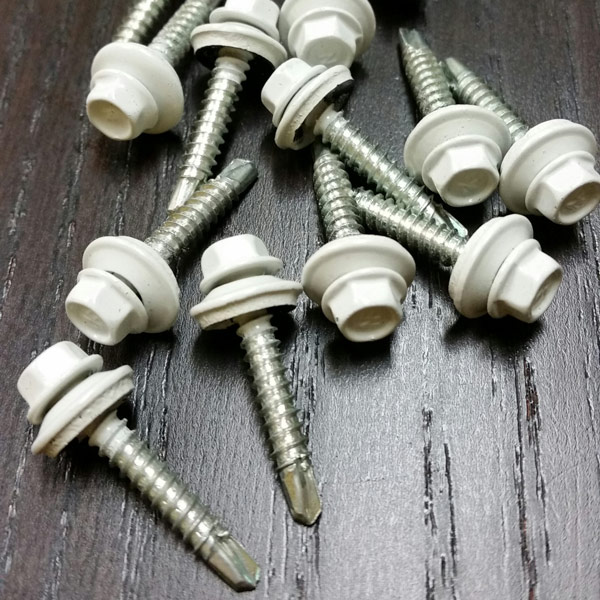
2. SCREWS: We recommend using our top-grade 1″ Screws with neoprene washers. Our screws are rated 3000 hours in accordance to the ASTM B117 Salt Spray Test (a standard hardware screw is only rated 60-80 hours). Additionally, the washers help prevent water intrusion.

To ensure secure attachment, space the screws approximately 18 inches apart along the stringers. Maintain a spacing of about 4-6 inches at the perimeter of the panel or on any overlapping joints. Exercise caution not to over-tighten the screws, as excessive force may damage the greenhouse panel. The washers should only leave a slight indentation in the greenhouse plastic.
3. CUTTING THE GREENHOUSE PANELS: When installing the greenhouse covering, you can easily cut Solexx using a sharp, thin utility knife or saw. It is helpful to attach the panel to your structure first. Then use a sharp thin utility knife and follow the greenhouse frame as a cutting guide. It works well to cut the panel with two passes of the knife. Use lightweight pressure on the first pass to score the panel and set the path the knife will follow for the second pass. Apply more pressure on the second pass to cut through the panel while making sure the knife follows the score line of the first pass.
4. CAULKING THE OPEN FLUTES: Solexx has the best insulation properties compared to other products in the market. To harness these impressive R-Values, it’s crucial to fill the ends of the flutes with a ¼” bead of clear 100% silicone caulking before installation or following any trimming of an already attached panel. This step effectively locks air within the flutes, enhancing insulation and preventing water infiltration.
Unless you will be cutting or trimming the panel after attaching it the frame, caulk the bottom portion of the panel before installing it. This precaution is essential because aiming a caulking gun upward from the ground can be challenging. The video below demonstrates how to caulk the panels.
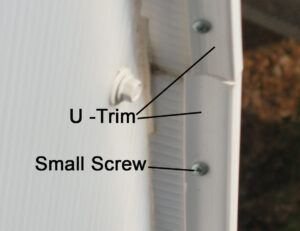
5. APPLYING U TRIM: Once the flutes of the panels are caulked, snap a U-trim over the end of the panel to create a permanent cap. Secure U-trim in place using the provided small Phillips screw. If needed, poke a small starter hole in one side of the U-trim with an ice pick or small nail. Screw through the hole and into the Solexx paneling. Place each screw approximately one foot apart. Apply caulking in all the holes you created to stop water penetration.

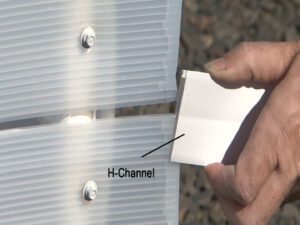
6. ATTACHING H-CHANNEL FOR AESTHETIC PURPOSES: H-Channel is recommended for aesthetic purposes for small greenhouses only. For large greenhouses, we recommend overlapping the panels where they meet on the framing for the best seal.
When opting for H-Channel, follow these steps:
- Attach one Solexx panel to your frame.
- Secure another panel approximately ¼” above the first one, creating a gap between them.
- Slide the H-channel into the gap between the panels.
- Attach screws about 1″ away from each side of the H-Channel. Take care not to screw directly into the H-channel itself.
If you encounter difficulty in sliding the H-channel onto the panels, try applying WD-40 to the grooves of the H-channel. Then, gently tap it into place using a rubber mallet.
Please note: If installing H-Channel on a roof, you may experience drips during heavy rain.

7. FOLDING THE GREENHOUSE PANELS: It’s not necessary to cut Solexx when installing the panel over roof peaks or around corners. Rather, you can score the greenhouse covering. Use a straight edge and a small blunt object such as a Philips screwdriver or handle of a butter knife. Note: be careful not to cut the plastic. After scoring, fold the panel along the scored line. You can score Solexx in either the direction of the flutes or across the flutes.
8. CHANGES IN SIZE: Apply the paneling when the temperature is at the mean (Yearly average) temperature for your area. This helps to allow for expansion and contraction.
9. CLEANING SOLEXX GREENHOUSE COVERING: To ensure maximum light transmission efficiency and maintain the pristine appearance of your greenhouse, we recommend wiping down the greenhouse panels with a mixture of soap and water at least once a year. It is safe to use disinfectant on Solexx.
10. OTHER APPLICATIONS: While HDPE plastic greenhouse panels lack “building code certification,” people have successfully used them for deck coverings, carports, swimming pool covers, porch enclosures, and wood storage. Although, many have had good results, we have found that it is not always the most suitable product for these applications.
11. PANEL SHIPPING: To keep shipping costs low, we roll Solexx for shipment. Remove the panels from the box and straighten by laying them out flat in a warm environment. If the roll/panel has been in storage, it may have developed a slight yellow tint from the UV inhibitor. Exposure to direct sunlight should quickly clear this up.
PLEASE NOTE: Do not use the panels to square your structure. Solexx panels and rolls may not be perfectly square.
If you have any additional questions about Solexx Greenhouse covering, please don’t hesitate to call Adapt8 / Solexx at 1-877-476-5399.
Looking for design inspiration? Check out the Solexx Blog.
